How to use the new ESSIC User Manager
The new ESSIC User Manager is easy to use, but differs from the old system. Watch the video or read the text below to find out how to complete common tasks.
Contact cazzy@umd.edu for any issues.
How to create
-
After logging into the WordPress dashboard, navigate to the “ESSIC User Manager” on the side menu.
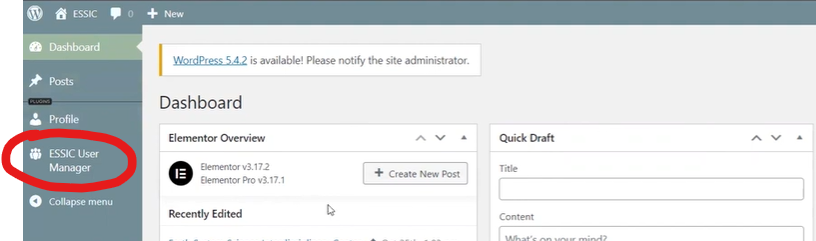
-
You should reach the ESSIC User Manager dashboard. On the top right, click “New”.
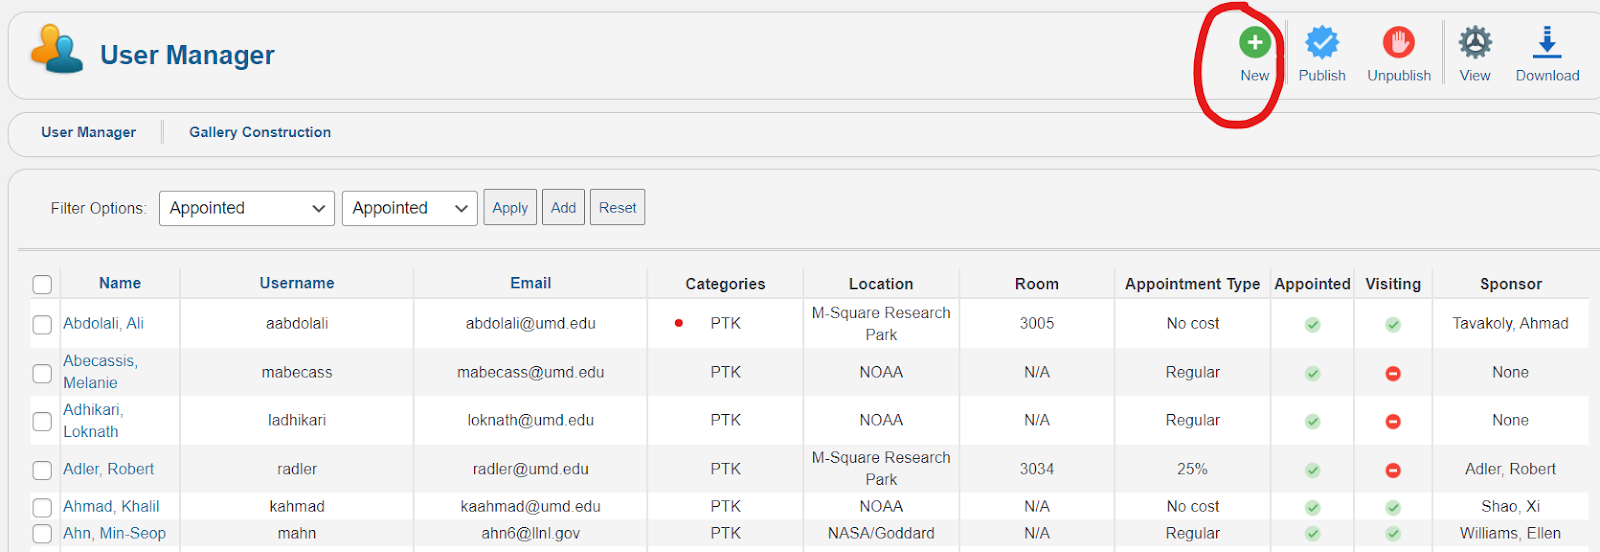
-
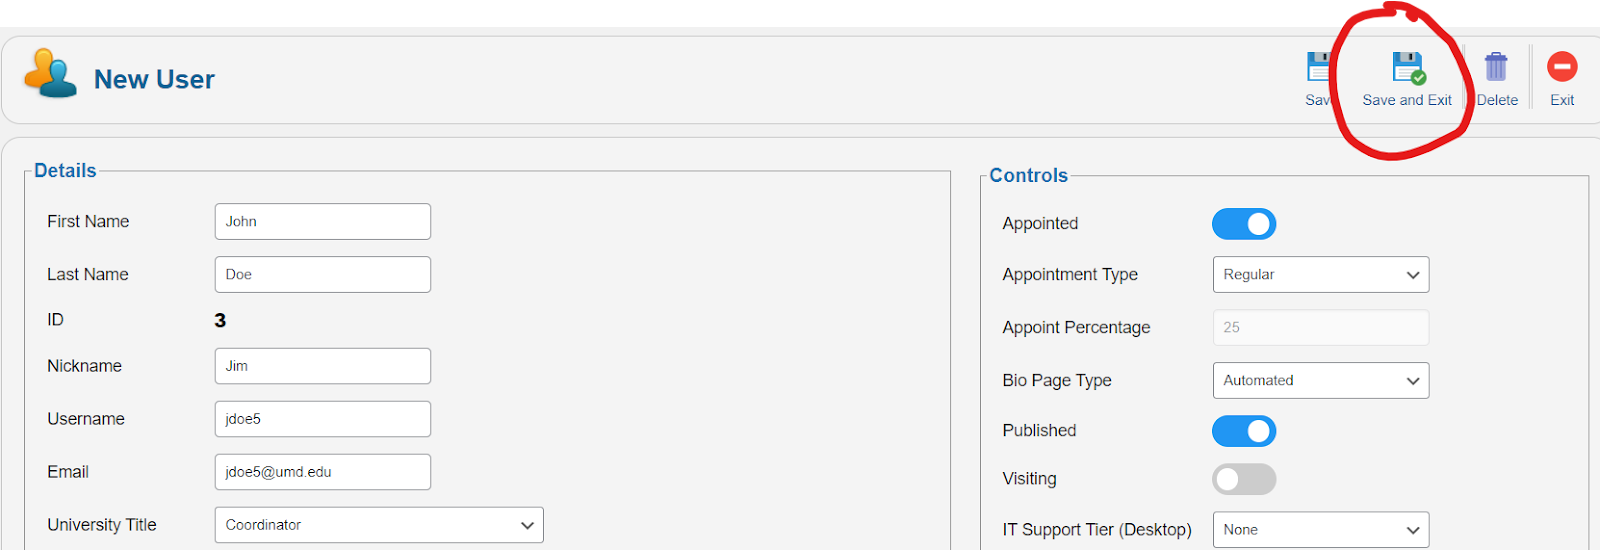
You will reach a screen divided into five categories: Details, Controls, Groups, Education, and Research Interests.
Education and Research Interests are fields currently filled in for faculty members by OITC upon appointment. The fields relevant to adding new users are all in Details, Controls, and Groups.
Under Details, you’ll find:
-
First Name*
-
Last Name*
-
ID (an unfillable field, ignore)
-
Nickname
-
Directory ID*
-
Email*
-
University Title*
-
Functional Title
-
Photo
-
Gender
-
Ethnicity
-
Sponsor
-
Affinity Group
-
College/Department*
-
Building
-
Room
-
Location*
-
Key Words
-
Phone 1
-
Phone 2
-
Website
The bolded fields with * are required, meaning that you are not able to submit a new user without completing those fields.
Under Controls are the following fields:
-
Appointed
-
Appointment Type*
-
Appoint Percentage
-
Bio Page Type
-
Published
-
Visiting*
-
IT Support Tier (Desktop)
-
IT Support Tier (Server)
-
ESSIC Email List
-
Researcher Email List
Again, the bolded with * fields are required.
Several of these fields are toggle buttons. When you click the button, the white circle will move from left to right and the button will turn blue. This indicates that the toggle is positive.
The toggle is off, indicating that the individual is not appointed.
The toggle is on, indicating that the individual is appointed.
You might notice that some toggle buttons flip on when you make changes. For example, “Published” and “ESSIC Email List” will flip when an employee is marked as “Regular”. When you select certain University Titles, some toggles under Groups will switch. It is always best practice to double check that these toggles are all accurate.
Under “Groups” are toggle buttons for the following categories:
-
ESSIC
-
Faculty PTK
-
Faculty TTK
-
Staff
-
Affiliates
-
AOSC Faculty
-
GEOL Faculty
-
OITC
-
PHYS Faculty
-
HR
-
ESSIC-AI
-
EBO
-
CBO
-
ESSIC Director's Office
-
CISESS Director's Office
-
Student
Assign the categories by clicking the toggle button and turning it blue. Assign the individual to groups based on why they were hired. “ESSIC” is a default category that is assigned automatically to all people.
For example, a staff member hired for the EBO would have the “ESSIC”, “Staff”, and “EBO” groups checked. A research-track paid faculty member would have “ESSIC” and “Faculty PTK”.
-
When you are done, click “Save and Exit” to return to the User Manager dashboard.
How to edit
-
To edit a specific user, find them in the dashboard view using the filter and search tools.
-
Once you’ve found the individual you want to edit, click their name (the blue link).

-
You can then edit their page as necessary. For a deep dive into the categories listed, see the Adding a User KB.
-
Make sure to Save or Save and Exit after you’ve finished making your edits.
How to filter/search
-
There are many ways to find a user using the User Manager dashboard. At the top of the screen, there is a field called “Filter Options” with a dropdown that reads as “Appointed” as a default.

-
Click the first dropdown to change the filter. The options are:
-
Name
-
Directory ID
-
Email
-
Location
-
Room
-
Appointment Type
-
Appointed
-
Published
-
Visiting
-
Sponsor
-
Category
-
Keyword
When you change the first dropdown, the second field will change as well to allow you to input that field for search.
-
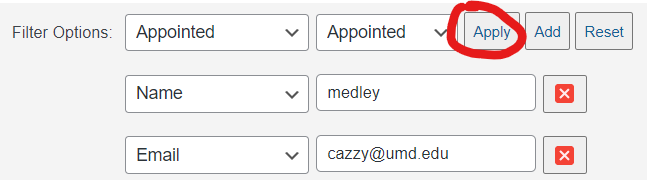
You can also search by several filters. If you click “Add”, another filter will appear.

You can search by up to 5 filters at once.
-
Once you’re finished selecting your filters, click “Apply” to apply the filters.
How to edit your view
-
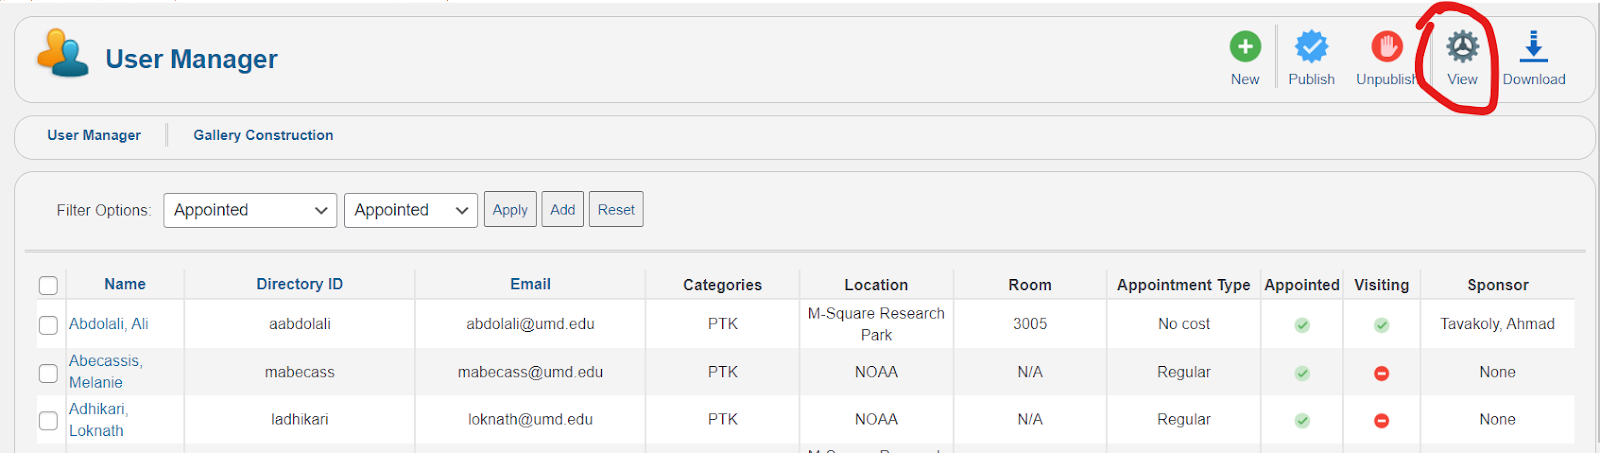
By default, the fields “Name”, “Directory ID”, “Email”, “Categories”, “Location”, “Room”, “Appointment Type”, “Appointed”, “Visiting”, and “Sponsor” appear on the dashboard, but that is editable. To change your default view, click the “View” button on the top right.
-
Clicking “View” will bring up the View Configuration menu. On this menu, click the toggle buttons to choose what fields you want immediately visible on your dashboard. Once you’ve chosen, click “Confirm” at the bottom of the window.

-
Once applied, your dashboard will default to your selected view when you reopen the page. Views can be changed an unlimited number of times, so feel free to experiment until you find something that works with your workflow.
How to download
-
The tool also allows you to download your current selection as a Microsoft Excel file. First, use the filters to refine your selection. For example, you could filter by “Appointment Type” being “No Cost”.
-
Click “Download” on the top right.

-
Access your downloaded file from the “Downloads” folder on your computer.